The Hexaframe

The Hexaframe is a pair of next-generation smart glasses designed for seamless everyday use. Featuring bone conduction audio, a sleek modular frame, and intuitive touch controls, it connects wirelessly to your smartphone for music, calls, and voice assistant access — all while keeping your ears open to the world. With carefully engineered hardware and minimalist design, The Hexaframe redefines how smart eyewear blends into daily life.
Introduction
The Hexaframe is a pair of smart glasses designed from the ground up to make human interactions with
technology more seamless in everyday life. Unlike traditional headphones or earbuds, the Hexaframe
leverages bone conduction transducers to deliver sound directly through the temporal bones of the user's
skull. This method leaves the ear canal open, preserving ambient awareness and enabling social
interaction while maintaining the connection to the digital world.
Designed as a fully wireless, Bluetooth-enabled device, the Hexaframe integrates advanced electronics
into a sleek eyeglasses form factor. With careful attention to ergonomics, electronics integration,
power management, and durability, the project aims to create a truly “minimally invasive” wearable human
interface device — one that fits into daily routines as naturally as a regular pair of glasses.
Idea
The concept behind The Hexaframe arose from a personal frustration. I often wanted to listen to music
while studying or walking through school, but didn’t want to block out the world entirely. Traditional
headphones made me feel disconnected from my environment and peers. Taking them off and on constantly
was disruptive and inconvenient.
That’s when I stumbled across an article on Hackaday.io about a DIY project that used bone conduction
audio in a similar way. The idea of glasses that could deliver audio while keeping ears open
immediately amazed me. But I saw an opportunity to improve on the original idea — by designing custom
PCBs, optimizing the form factor, and creating something that felt more like a polished consumer product
than a hacky prototype.
This sparked a journey of research, prototyping, engineering and a fair bit of frustrating challenges,
ultimately culminating in what is now the Hexaframe.
Previous versions
The path to a working prototype was far from linear. Early versions of the project were plagued by
design flaws. Initial PCBs I designed had serious functional issues — such as unconnected traces and
violations of fundamental layout principles. Some designs never made it past the layout stage because
they were so clearly flawed; others were manufactured but never assembled.
In hindsight, these iterations were critical learning experiences. They forced me to revisit the
fundamentals of schematic design, PCB layout, signal integrity, and system integration.
Current version
The latest iteration of The Hexaframe reflects a complete redesign, incorporating lessons learned from past mistakes. At its core, this version is centered around five major goals:
- Deliver high-quality, open-ear audio through bone conduction
- Support voice input for calls or smart assistant access
- Maintain full wireless functionality with Bluetooth audio streaming
- Provide intuitive, low-power user interaction through capacitive touch
- Achieve maximum compactness and reliability within the sunglasses form factor
All major hardware is split across two PCBs embedded into the temples of the glasses, interconnected via a flexible printed circuit (FPC) routed through the hinge. The left side contains its audio amplification hardware and the battery, while the right side houses another set of audio hardware, the microcontroller, sensors, antennas, and additional logic. The entire system is powered by a rechargeable LiPo battery and managed through a compact voltage regulation and fuel gauging setup.
Parts selection
With space and power constraints in mind, every component in the Hexaframe was chosen with great care.
Since the glasses need to perform various audio, wireless, and user interface tasks simultaneously, the
components had to be small, energy-efficient, and interoperable.
The MCU lies at the heart of the system, providing Bluetooth connectivity, audio processing, sensor
interfacing, and power management.
For audio output, a digital amplifier was selected that combines both DAC and amplification in a single,
compact package. This feeds the bone conduction transducers embedded in each temple. To keep the signal
clean and reduce noise susceptibility, digital microphones with built-in ADCs were chosen for voice
input.
Touch input is handled by a capacitive sensor IC that supports multiple electrodes. This allows for
gestures like taps and swipes to be detected along the right temple, functioning as an intuitive slider
interface for volume and playback control.
Other essential components include a fuel gauge IC for battery monitoring, voltage regulators for stable
power delivery, and ESD protection to safeguard the charging interface’s exposed contacts.
Schematics
The device’s schematic is split across three boards: the main PCB (right temple), the secondary PCB
(left temple), and the FPC that connects them.
On the main PCB, the MCU interfaces with all core peripherals: the capacitive touch sensor, digital
microphones, amplifier, fuel gauge, and status LED. A debug interface allows for firmware development
and troubleshooting. Power distribution is handled by a dedicated voltage regulator, ensuring a stable
3.3V supply from the fluctuating battery input.
The secondary PCB contains a simplified circuit, including a second amplifier and battery connection
pads. Audio and power signals are routed through the FPC, which acts as both an electrical and
mechanical bridge between the two temples.
Each schematic was designed to ensure optimal signal integrity, minimal EMI, and efficient power
distribution across the device.
PCB Layout
Given the narrow, elongated shape of the temple arms, the PCB layout required meticulous planning. The
main board is only 8mm wide and therefore highly space-constrained. It uses a six-layer stackup to manage
high-density routing with mixed signals, where signal separation is imperative.
Key layout considerations included:
- Short, shielded transmission lines for the 2.45 GHz antenna to ensure good RF performance.
- Capacitive electrodes with signal guarding for reliable touch input.
- Wide ground zones to shorten ground return paths and voltage drop, especially important for audio output.
- Isolation of sensitive analog and digital sections to reduce interference.
Despite these constraints, the final dimensions of 76 × 8mm were achieved.
Careful routing and layer assignment allowed for parallel signal paths with minimal crosstalk. Special attention was also given to thermal management and assembly tolerances, given the small size and complex geometry of the frame.
CAD
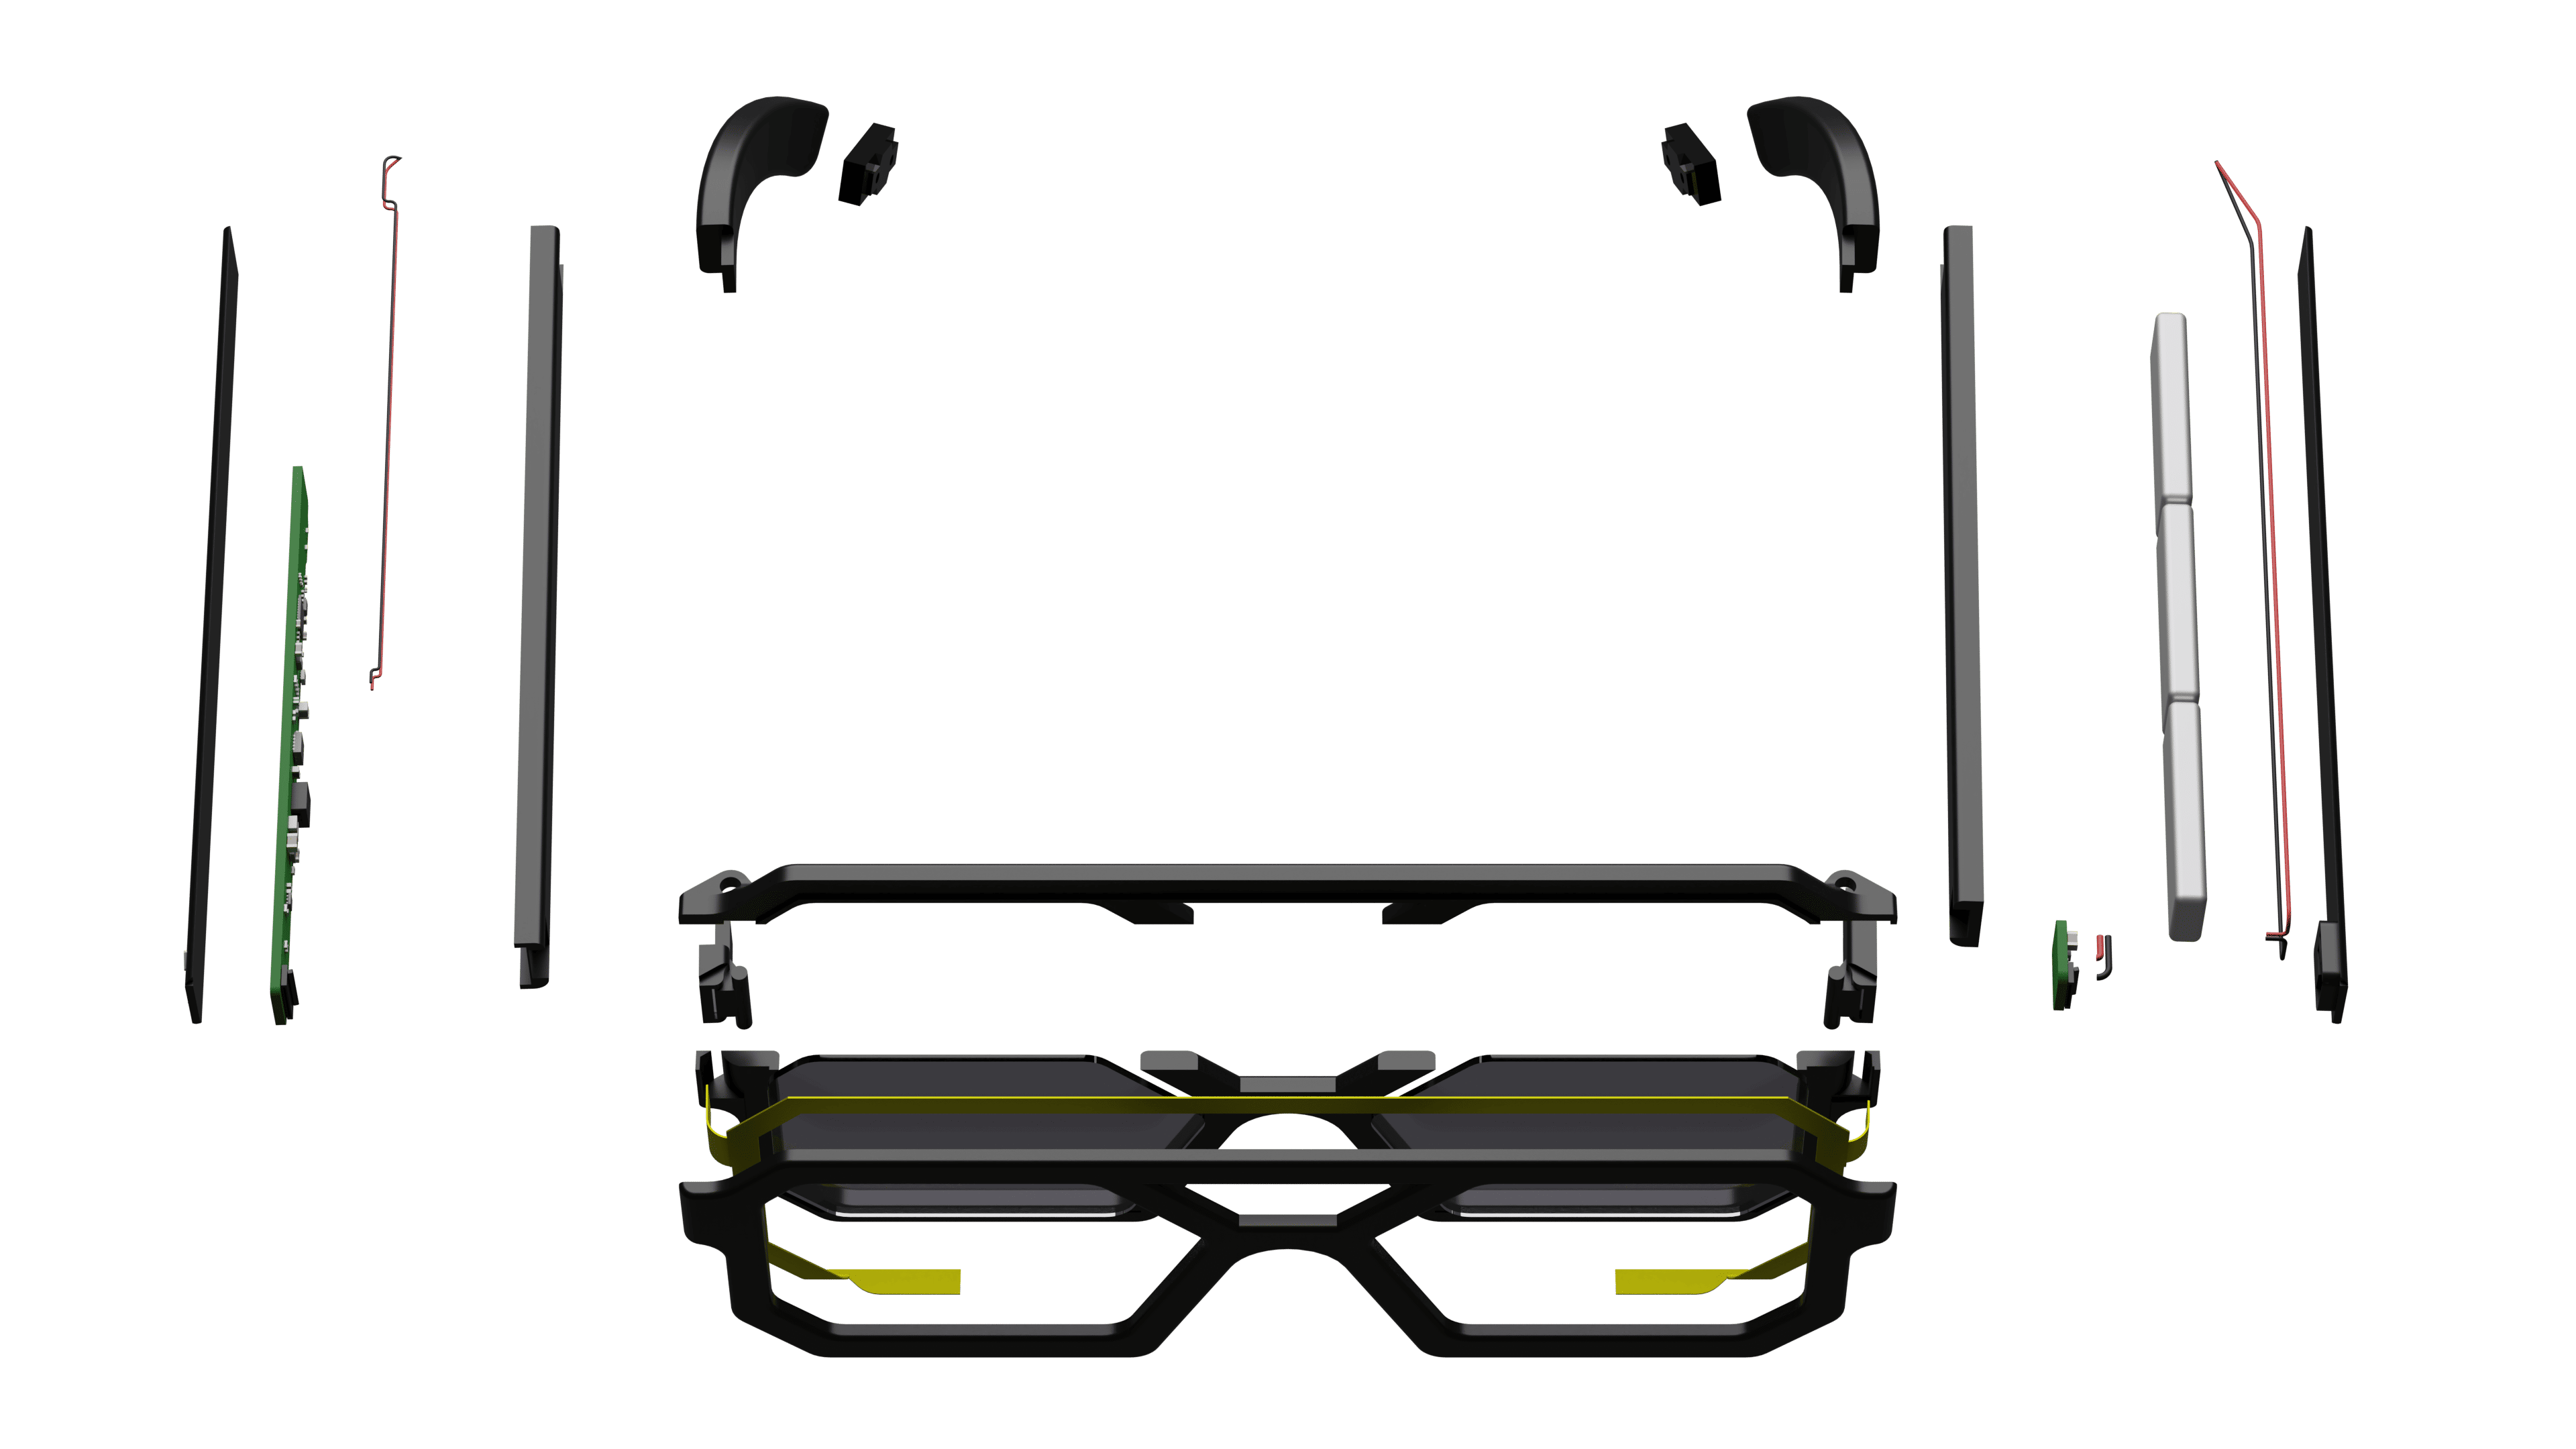
The mechanical frame of the Hexaframe was designed in Autodesk Fusion, using STEP exports from the KiCAD
PCB layout. The glasses consist of three main parts: the left and right temples, and the front frame
connecting them.
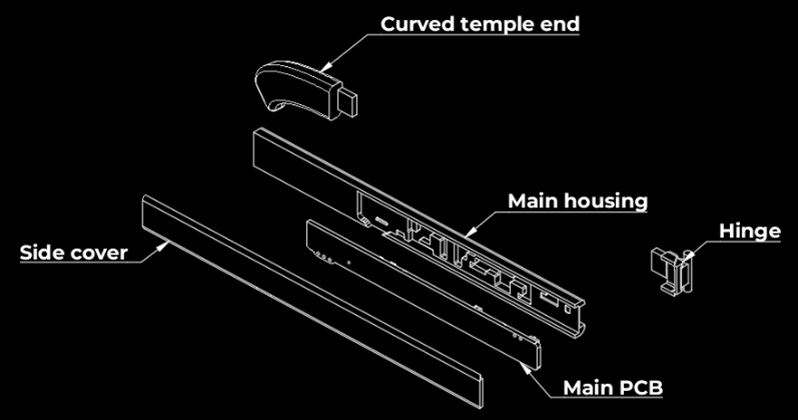
The temples are shaped to ergonomically fit around the ear and include mounting cavities for the PCBs,
batteries, and speakers. The frame design accommodates a 3D-printable assembly with no overhangs, thanks
to strategic splitting of the parts and modular covers that allow access to internal components.
The hinge was custom-designed to route the FPC while allowing full folding motion. This component went
through multiple iterations to balance durability, flexibility, and manufacturability.
FPC
Connecting the left and right temples is a two-layer flexible printed circuit (FPC). This flexible
interconnect carries both power and digital signals across the hinge and around the front of the
glasses.
The FPC design includes:
- An edge connector with exposed gold fingers for high-reliability contact.
- Rounded trace corners to improve mechanical flexibility and reduce stress concentration.
- High-current traces with increased width to accommodate power transfer to the left PCB.
- A precise folding path through the hinge to account for the dynamic movement of the temples.
Since the microphones need to face the user’s mouth, the FPC is bent and flipped in a way that preserves their orientation. This fold was carefully modeled in CAD to ensure the correct geometry and fit.
Prototypes
Prototyping the Hexaframe involved multiple manufacturing partners and careful assembly planning. The
PCBs and FPCs were ordered from a fabrication house that offers high-resolution manufacturing tolerances
and in-house assembly.
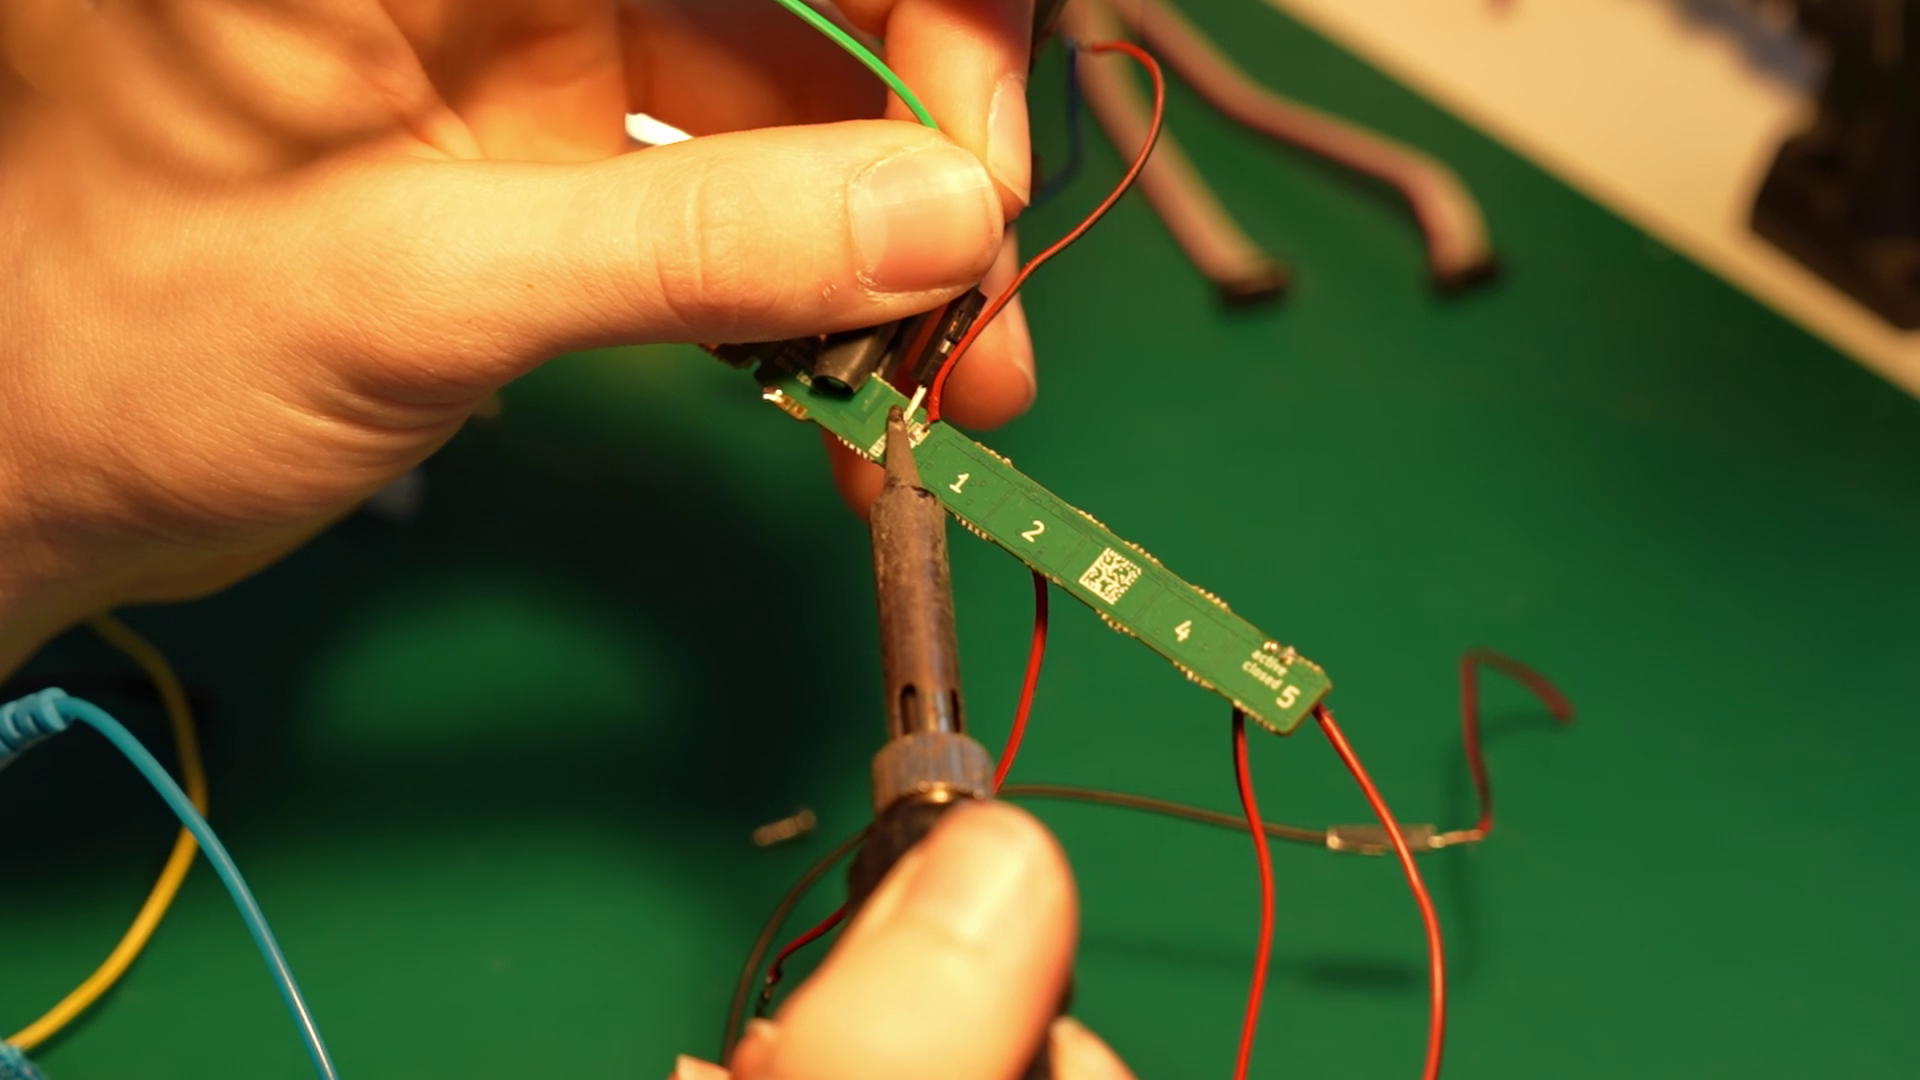
The initial prototypes were manufactured with full SMT assembly, including X-ray inspection for BGA and
QFN packages. After receiving the boards, testing began using a development interface connected to a PC.
The device was recognized by the development software, and early firmware testing showed promising
results.
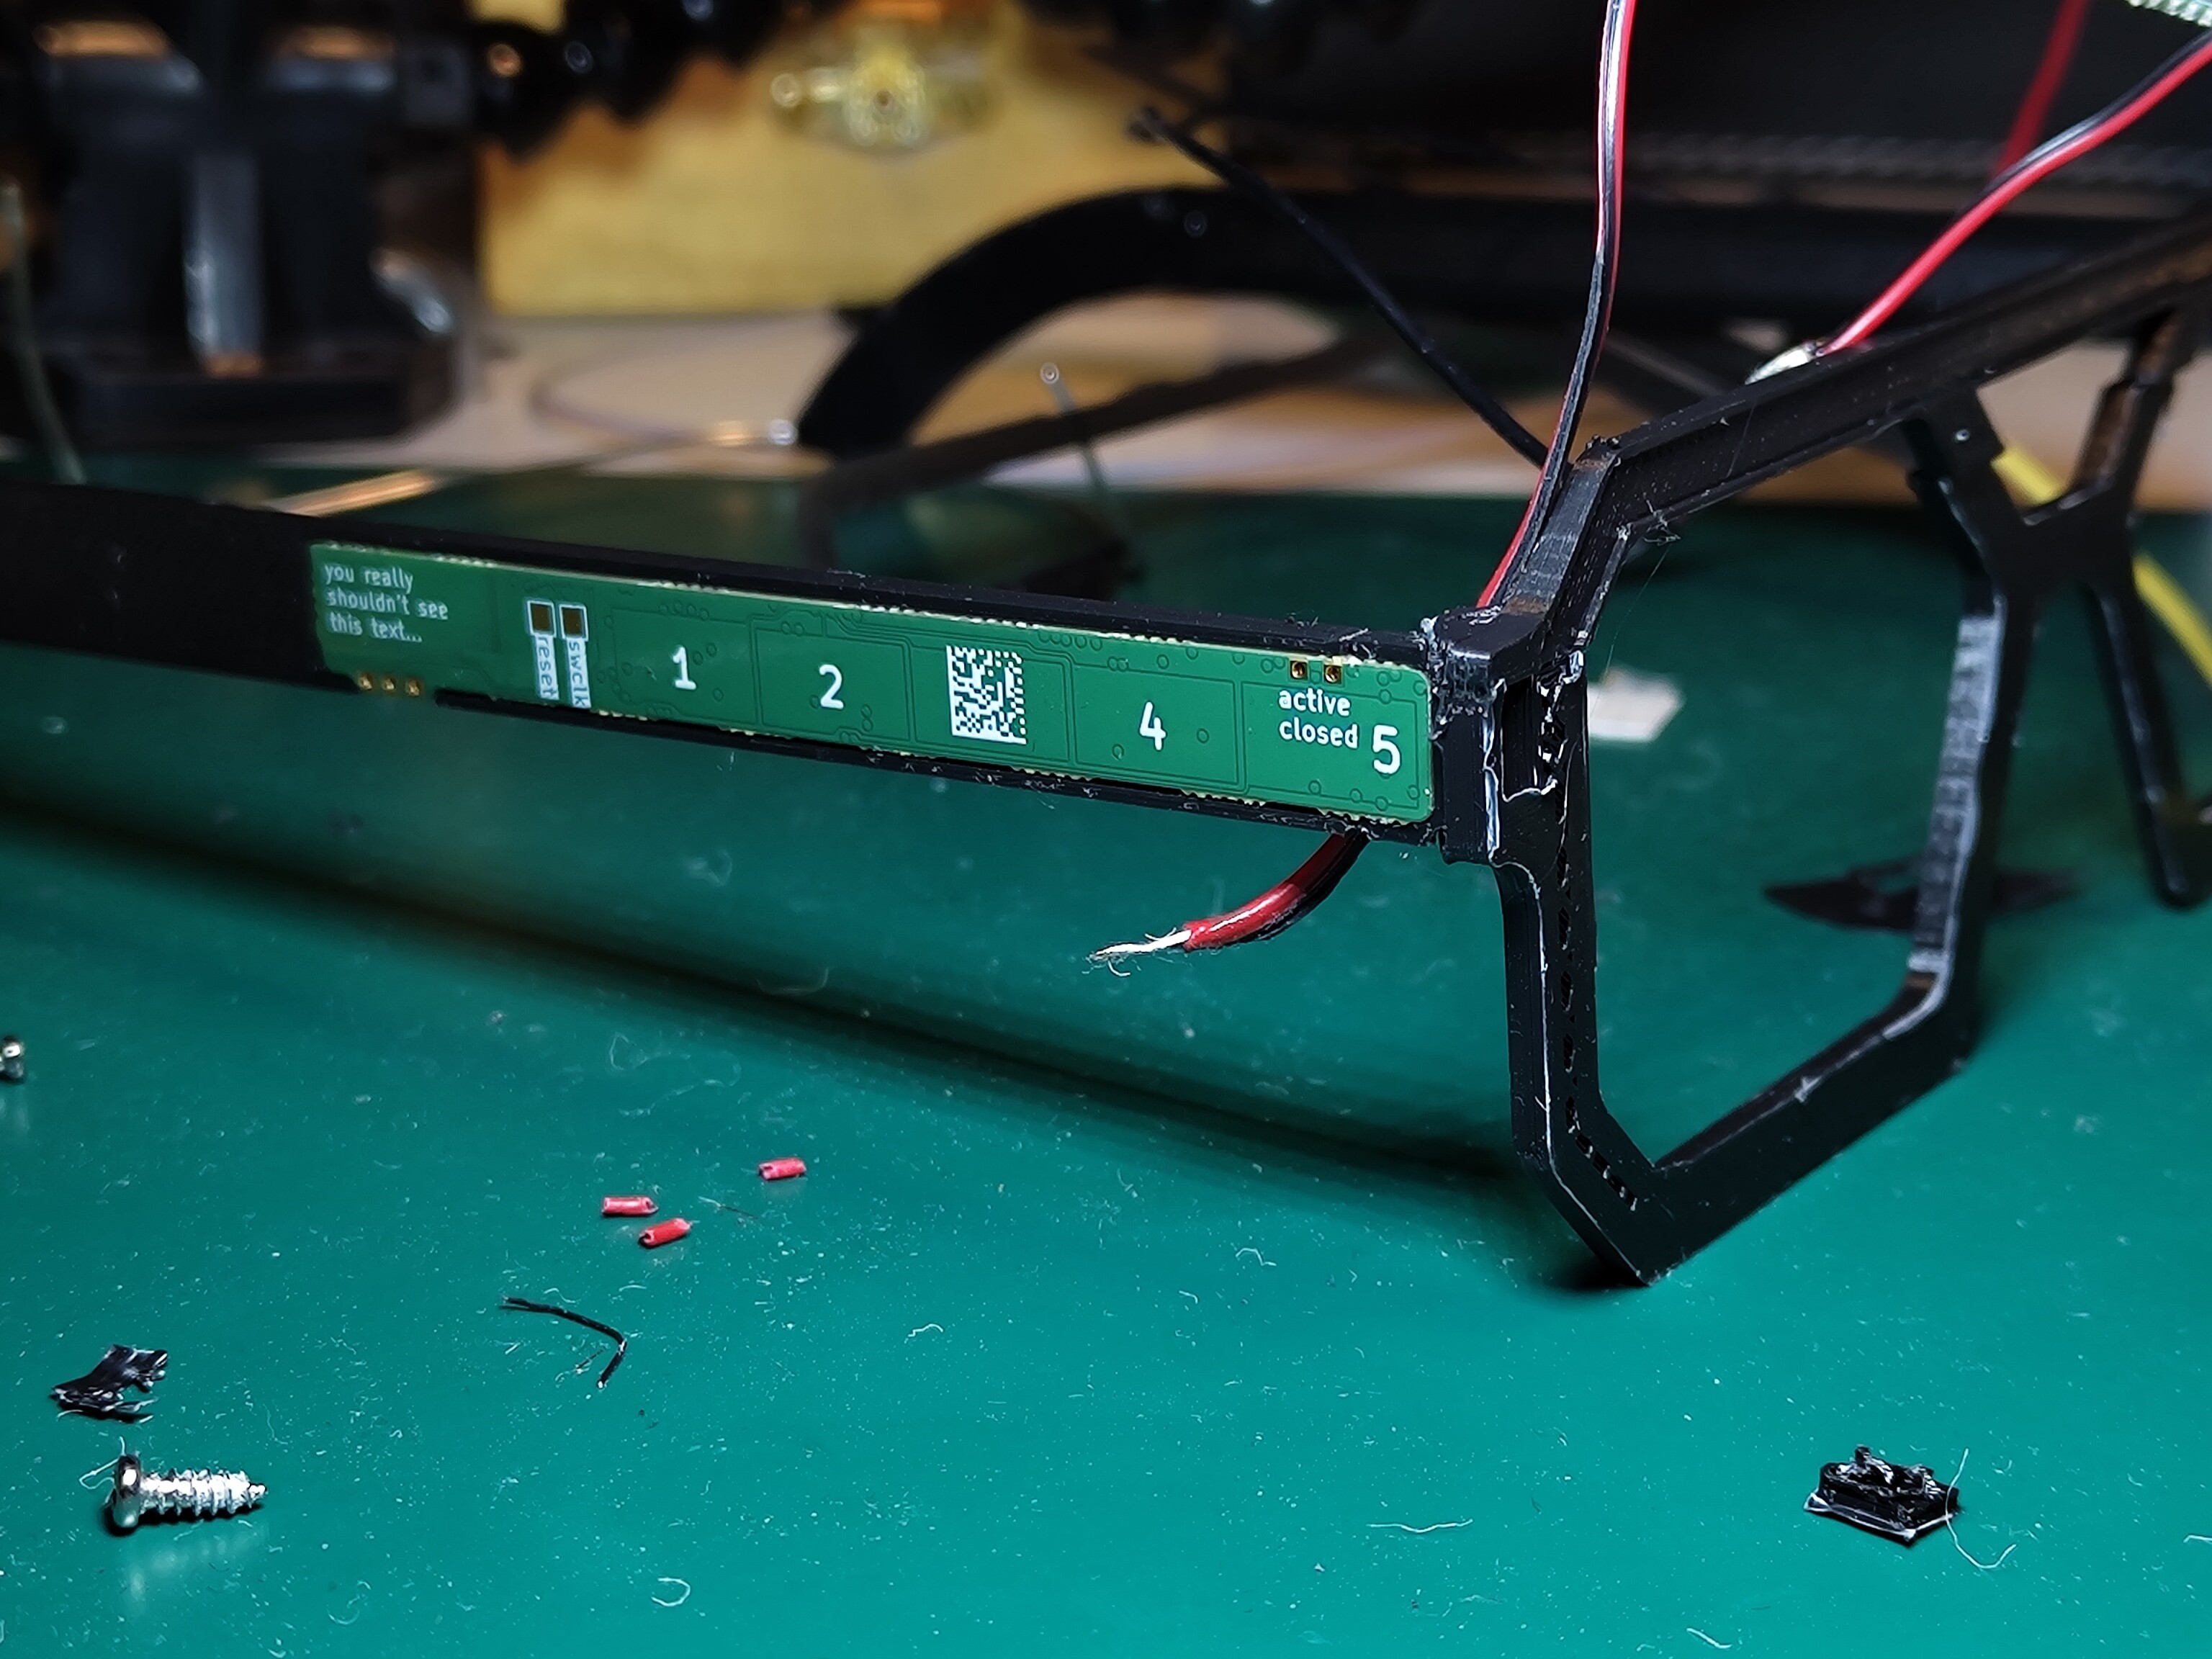
Frame prototypes were 3D-printed in PLA to validate fit and assembly. The final model was split into 13
printable parts that could be snapped together. Multiple revisions of the hinge and covers were printed
beforehand to find the ideal balance between robustness and appearance/user comfort.
Conclusion
The Hexaframe represents the culmination of over two year of hands-on engineering, design iteration, and
problem-solving. It merges mechanical, electrical, and software design into a wearable device that fits
naturally into everyday life. The glasses allow for open-ear audio playback, voice input, and intuitive
touch control — all without disrupting the user's awareness of their surroundings.
Although the project began with a simple goal — to listen to music during class without being antisocial
— it evolved into a full-fledged exploration of modern hardware design. The challenges encountered along
the way, from early layout mistakes to hinge geometry and power efficiency, only strengthened the final
product.
There’s obviously still plenty of room for improvement and future iterations, but the Hexaframe already
shows that it's possible to build advanced, user-friendly wearable tech without a massive budget and
expensive instruments. (The total cost of this project including materials and tools was under 1000€!)
Most importantly, it’s a product built with curiosity, and a desire to solve real-world problems through
thoughtful engineering.